If you’re looking to add a personal touch to your home decor, stenciling is an easy, affordable, and creative way to do it. Whether you want to transform a plain wall into a statement piece or add subtle accents to a room, stenciling gives you the flexibility to customize your space. In this blog post, we’ll cover the essential stenciling techniques for DIY wall art projects to help you create professional-looking results without breaking the bank.
What is Stenciling?
Stenciling is a method where paint is applied over a pre-cut template to recreate patterns, designs, or motifs on various surfaces. It allows for clean, repeatable designs that can be as simple or intricate as you want. With a bit of patience and the right tools, anyone can master the art of stenciling.
Getting Started with Stenciling: Tools and Materials You’ll Need
Before jumping into your stenciling project, make sure you have the following tools:
- Stencils: You can buy pre-made stencils or create custom designs with stencil paper or mylar.
- Paint: Acrylic paint works best for walls. Chalk paint for a matte finish or spray paint for larger areas can also be used.
- Stencil Brushes and Foam Rollers: A stencil brush with stiff bristles or a foam roller is ideal for applying paint evenly.
- Painter’s Tape: Use this to secure your stencil in place to avoid movement.
- Stencil Adhesive (optional): Helps keep the stencil flat and prevents paint from bleeding underneath.
- Drop Cloth: Protects your floors from any spills or splatters.
Top Stenciling Techniques for DIY Wall Art
1. Dry Brushing
Dry brushing is one of the most popular stenciling techniques for ensuring crisp, clean edges on your designs. Here’s how to do it:
- Step 1: Dip your stencil brush lightly into paint.
- Step 2: Remove excess paint by dabbing it onto a paper towel.
- Step 3: Lightly tap the brush in a circular motion over the stencil. This method builds up color gradually and prevents bleeding.
Dry brushing works well for detailed stencils where precision is key, making it perfect for intricate patterns or typography.
2. Pouncing
Pouncing is a technique where you tap the brush or sponge directly onto the stencil. This is ideal for getting full, even coverage with bolder designs.
- Step 1: Load the stencil brush with paint, offloading any excess.
- Step 2: Hold the brush upright and “pounce” it straight up and down, tapping it onto the stencil.
- Step 3: Repeat until the stencil area is fully covered.
Pouncing is best used for filling larger shapes and designs, like geometric patterns or floral motifs.
3. Foam Rolling
For large wall stenciling projects, foam rollers provide quick and smooth coverage.
- Step 1: Dip a small foam roller into the paint, ensuring it’s evenly coated.
- Step 2: Roll the foam over the stencil using light pressure to avoid smudging.
- Step 3: Apply multiple thin layers if needed to achieve the desired opacity.
Foam rolling is ideal for creating clean, uniform stenciled patterns over big areas, such as a feature wall or border design.
4. Ombre Stenciling (Gradient)
This technique involves blending two or more colors to create a fading, ombre effect across your stencil design. Here’s how to achieve it:
- Step 1: Prepare two or more paint shades on your palette.
- Step 2: Start with one color on one part of the stencil and gradually transition to the next color, blending the two where they meet.
- Step 3: Use a sponge or soft brush to create smooth transitions between colors.
Ombre stenciling is a creative way to add depth and interest to your wall art. It’s particularly striking with floral designs, mandalas, or abstract patterns.
5. Spray Painting
If you’re covering a large surface or want to achieve a smooth, even finish, spray painting can be an efficient method.
- Step 1: Set up your stencil and use painter’s tape or adhesive to hold it in place.
- Step 2: From about 8-12 inches away, lightly spray the paint in a sweeping motion over the stencil.
- Step 3: Wait for the paint to dry slightly before removing the stencil to avoid smudging.
Spray painting is fast and effective, especially for larger, simpler designs. Just be sure to mask off areas you don’t want the paint to reach.
Tips for Professional-Looking Results
- Use Minimal Paint: Less is more when stenciling. Overloading the brush or roller can cause paint to bleed under the stencil edges.
- Secure the Stencil Well: Use painter’s tape or stencil adhesive to keep your stencil in place, preventing any unwanted shifting during the process.
- Test First: Always test your stencil and paint on a piece of cardboard or scrap wood before committing to your wall. This ensures the paint consistency and technique work well together.
- Work in Layers: Apply paint in thin layers and build up gradually to avoid oversaturation.
Popular DIY Stenciling Design Ideas
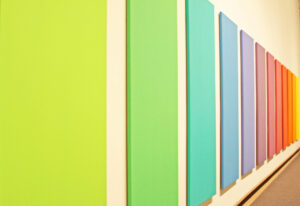
Geometric Patterns
Geometric shapes like hexagons, triangles, or chevrons are ideal for creating modern wall art. Use them to create a feature wall in a living room or bedroom.
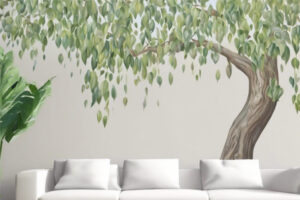
Floral Motifs
For a more natural, elegant look, try floral stencils. They can be used for everything from small accents to full-wall murals.
Typography and Quotes
Add a personal touch to your walls with your favorite quotes, mantras, or song lyrics using typography stencils.
Borders and Trims
Create a sophisticated look by adding stenciled borders along the ceiling, baseboard, or around door frames. This technique can add definition and refinement to any room.
Common Stenciling Mistakes to Avoid
- Bleeding Paint: This occurs when too much paint is applied. Always blot off excess paint before applying it to the stencil.
- Smudging: Rushing through your project can result in smudges. Allow paint to dry before removing the stencil or moving to the next section.
- Misaligned Patterns: Take your time when aligning stencils, especially when working with repeating designs. Use a level to keep everything straight.
Conclusion: Elevate Your Home with DIY Stenciling
Stenciling offers endless possibilities for customizing your home decor. Whether you’re looking to create a subtle design or a bold statement piece, stenciling techniques like dry brushing, pouncing, or ombre blending can bring your DIY wall art projects to life. Armed with the right tools and techniques, you’ll be able to create stunning, professional-quality stenciled designs in any room of your home.
Now that you’re equipped with the knowledge, it’s time to pick up your stencil and start crafting your unique wall art masterpiece!